Category: analytics

  • Centralized Column Level Permissions in Data Lakes

    Almost every organization has a Data Lake today in some form or the other. Every cloud provider has simplified the process of building Data Lakes. On AWS, you can start having one with just these simple steps:

    • Create a S3 bucket
    • Ingest data into the S3 bucket (through Kinesis Firehose, APIs, etc…)
    • Use a Glue crawler to crawl that data and populate metadata in the Glue Catalog
    • Use Athena to start analysing the data through SQL

    With the above steps, you have data flowing into your Data Lake and you address few use cases. Once the above setup is in place, quickly the Data Lake would start collecting a lot of data. On the other hand, different folks in your organization would start accessing this data. And sooner than later, if you are the owner of this Data Lake, you start worrying about one big challenge.

    Data Access Control in Data Lakes

    As different users in your organization access the Data Lake, how do you implement “Access Control” mechanisms in your Data Lake? So that people with the right permissions & clearances can only view certain sensitive/confidential data.

    Let’s say your Data Lake holds customer information. You need to hold PII information such as email address and phone numbers for your marketing automation. At the same time, you do NOT want your Data Analysts to have access to this information (let’s say their typical use cases do not require access to email address and phone numbers).

    This has been addressed in Databases for many decades now. You implement “Access Control”. In Databases, you define fine grained permissions (typically through GRANT) on who can access what data.

    So, how do you implement something similar to a Data Lake? And more importantly where do you implement this access control?

    Access Control Permissions at the Data Catalog

    One of the key attributes of a Data Lake is the ability to use different tools to process & analyze the same data. Your Data Lake users could be using a SQL based tool today for some adhoc analysis and would later switch to running a Spark cluster for some compute intensive workload.

    So, you could implement Access Control at the individual tool level. For example, if you are using Amazon Athena and AWS EMR, you could implement permissions in these services to control who has access to the data being analyzed through these services.

    However, a better and scalable alternative is to implement the Access Control permissions at the Data Catalog level. This provides us the following advantages:

    • All the services that your Data Lake users use to process data leverage the same underlying catalog. And permissions are maintained there
    • The permissions are implemented centrally and can be managed at one place instead of duplicating at many services. Whenever users no longer need access to your Data Lake, you can delete their access at one place
    • You get a single view of who can access what. Simplifies audits

    Implementing Centralized Column Level Permissions in AWS Data Lakes

    Let’s look at how to implement a centralized column level permissions in AWS Data Lakes with an example.

    Sample Data

    I have got the New York City Taxi trip record data set in my S3 bucket. It’s organized month wise as below. This is a public dataset available here: https://registry.opendata.aws/nyc-tlc-trip-records-pds/.

    New York City Taxi trip data

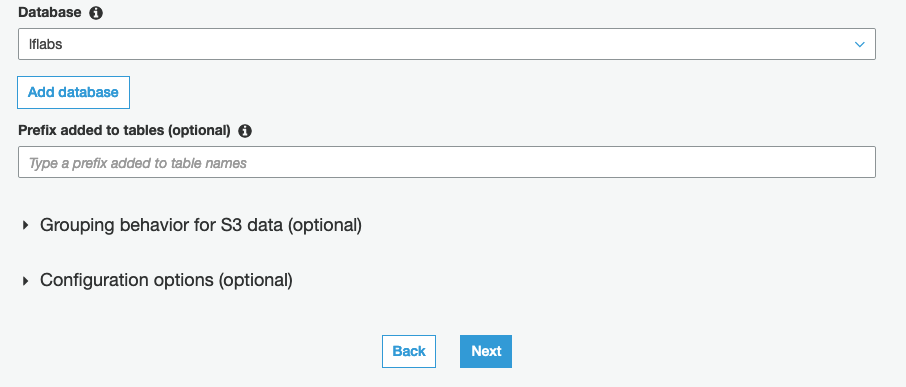
    Create a Database using AWS Lake Formation

    Head over to AWS Lake Formation and create a Database that will hold the metadata. For instructions on how to create a database, check this documentation: https://docs.aws.amazon.com/lake-formation/latest/dg/creating-database.html

    Create a AWS Glue crawler to populate metadata

    The next step is to create a Glue crawler, crawl the sample data and populate the metadata in the Lake Formation database that we created earlier. Check this documentation https://docs.aws.amazon.com/glue/latest/dg/console-crawlers.html for instructions or follow the step by step instructions in the Glue Console.

    When you create the crawler, provide the Lake Formation database that you created earlier as part of the Crawler’s output configuration.

    Once the crawler completes, go back to Lake Formation console and you should see a table created under “Tables”. Here’s a screenshot of my Lake Formation table. Your’s should look something similar.

    Here’s the table schema as discovered by the Glue crawler.

    Restricting access to few columns

    Let’s say, out of the above columns, we do NOT want regular users of our Data Lake to view the “fare_amount” and “total_amount” columns.

    For this purpose, I have created an IAM user called “dl-demo-user” for whom I would like to restrict the above two columns.

    1. In AWS Lake Formation, select the table that was populated by the Glue crawler
    2. Click on the Actions menu at the top and select the Grant option

    In the next screen, provide the following inputs:

    1. Select the IAM user(s) that you would like to restrict access. I chose the “dl-demo-user” that I created specifically for this demo
    2. In the “Columns” drop down, choose “Exclude columns
    3. Select the “fare_amount” & “total_amount” in the “Exclude columns” drop down
    4. For Table permissions, choose “Select

    That’s it.

    Now, I log in as the “dl-demo-user” and head over to Athena to execute the following query:

    select * from nyc_taxi LIMIT 10;

    The Athena query results no longer show the “fare_amount” and “total_amount” columns.

    If the same user were to use AWS EMR or Quicksight to access the same data, the user will NOT have access to the above two columns.

    However, when I run the same query using a different user, the query results include the “fare_amount” and “total_amount” columns.

    Viewing Data Permissions

    You can also use Lake Formation to get a single consolidated view of permissions across all users of your Data Lake.

    Click on “Data Permissions” from the left menu of the Lake Formation console to view all permissions. You can also use the “Grant” and “Revoke” buttons at the top to manage permissions from this page.

    Conclusion

    Implementing column level permissions is an important requirement for many organizations. Especially if your data lake consists of sensitive data (such as customer, sales, revenue), you would definitely have requirements to restrict access to certain fields only to few folks who have the necessary clearances.

    Such permissions when implemented at the Data Catalog level provides the following advantages:

    • Users of your Data Lake can continue to leverage different services like Athena, EMR, Glue, Quicksight to analyze the data
    • From a Data Governance point of view, you can manage permissions centrally at the Data Catalog level using Lake Formation
    • Permissions from Lake Formation automatically federate across all services without the need to duplicate it at each service
    • Whenever you need to add/delete users of your data lake, you get to manage it at one place

    Hope this article provided some ideas on how to implement column level permissions for your Data Lakes on AWS. What are some other tools/techniques that you use to implement the same? Do share them in the comments below.

  • Beyond The Shiny New Toys | Redshift

    Beyond The Shiny New Toys | Redshift

    This is part of the Beyond The Shiny New Toys series where I write about AWS reInvent 2019 announcements

    Amazon Redshift has been going through a series of major changes which tremendously simplifies schema design and overall management of workloads. Here are some of the new features that were announced around the re:Invent 2019 timeframe that I specifically think a lot of customers (based on my earlier interaction with them) would look to put in use

    Materialized Views

    https://aws.amazon.com/about-aws/whats-new/2019/11/amazon-redshift-introduces-support-for-materialized-views-preview/

    This has been one of the most wanted asks from many customers who migrate from other DW systems into Redshift. Materialized Views (MV) have a significant improvement on query performance for repeated workloads such as Dashboarding, queries from BI tools or certain predictable steps in ETL pipelines.

    Till now, Redshift lacked support for MV and the recommendation has been to either modify your workloads or implement architectural changes such as performing a query rewrite using pg_bouncer

    You can now use the native MV (available in preview) capability to address such needs. There are some current limitations though. For example, you need to manually refresh the MV whenever your base tables undergo changes. Over time, I am sure AWS folks would address these limitations based on customer feedback. You can find the complete set current limitations here: https://docs.aws.amazon.com/redshift/latest/dg/mv-usage-notes.html

    Automated Table Sort

    https://aws.amazon.com/about-aws/whats-new/2019/11/amazon-redshift-introduces-automatic-table-sort-alternative-vacuum-sort/

    One of the most important best practices when it comes to Redshift is to keep the data Sorted. This would directly improve query performance as Redshift can read specific blocks of data (when your query has a filter) and also apply compression better. If your data is NOT sorted well enough, Redshift may read unwanted blocks and then later skip them in the memory. So, on incremental data loads, you had to earlier run “VACUUM SORT” command to make sure the data blocks are sorted.

    With this new feature, Redshift automatically performs the Sorting activity in the background without any interruption to query processing. However, if you do have large data loads, you may still want to run “VACUUM SORT” manually (as Automatic Sorting may take a while to fully Sort in the background).

    You can also monitor the “vacuum_sort_benefit” and “unsorted” columns in the SVV_TABLE_INFO table. Together, these columns tell you the following:

    1. What percentage of a particular table is “unsorted”
    2. How much percentage benefit would you derive by running “VACUUM SORT” against the table

    Check the following documentation for more details: https://docs.aws.amazon.com/redshift/latest/dg/t_Reclaiming_storage_space202.html#automatic-table-sort

    ALTER SORT KEY Dynamically

    https://aws.amazon.com/about-aws/whats-new/2019/11/amazon-redshift-supports-changing-table-sort-keys-dynamically/

    When you start using Redshift, you pick Distribution and Sort Keys for your tables. However, over time, as your workload evolves there may be a need to modify the Sort Keys that you originally picked. Previously, this meant, recreating your table with the new set of Sort Keys and loading all the data into that newly created table. This was required because, Redshift physically sorts the data in the underlying disks. Changing your Sort Keys meant re-sorting your data.

    With this new feature, you can now dynamically change the Sort Keys of your existing table. Redshift, behind the scenes will re-sort the data while your table continues to be available for querying. This provides more flexibility when it comes to schema design.

    Cross Instance Restore

    https://aws.amazon.com/about-aws/whats-new/2019/11/amazon-redshift-launches-cross-instance-restore/

    This is another important feature and one that has been long requested by customers. You may want to restore a snapshot of production DC2.8XL cluster into a smaller DC2.Large cluster for your test/dev purposes. Or you may have a DC2.Large cluster with many number of nodes. You have a snapshot of that cluster and wish to launch a cluster with smaller number of DC2.8XL cluster. This wasn’t possible until this capability was introduced.

    One of the important aspects that you want to consider when doing this exercise is to undersatnd how would your “target” cluster’s storage utilization on each node would look like. The following command in the AWS CLI would throw you some options to consider:

    aws redshift describe-node-configuration-options --snapshot-identifier <mycluster-snapshot> --region eu-west-1 -—action-type restore-cluster

    Automatic Workload Management

    https://aws.amazon.com/about-aws/whats-new/2019/09/amazon-redshift-announces-automatic-workload-management-and-query-priorities/

    This isn’t a re:Invent timeframe announcement as such. This was announced in September. But I am including it here because this is a big one and simplifies day to day operations of a Redshift cluster for an administrator.

    Even some of the large Redshift customers find it cumbersome to perform Workload Management (WLM) on Redshift. WLM on itself is a pretty deep topic and is something that you cannot avoid once your workloads start scaling on Redshift.

    WLM provides many controls for a Redshift administrator to manage different workloads and give better experience for all types of users of the system. Over the years, WLM has evolved from a static configuration to a dynamic configuration (of queues and memory) with Queue Priorities, Query Monitoring Rules, Queue Hopping, Short Query Acceleration and Concurrency Scaling.

    However all of these require someone to continuously observe the workloads on the cluster and keep tweaking these configurations. With Automatic WLM, Redshift removes much of these overheads from the administrator.

    With Automatic WLM, you still define Queues, Queue Priorities, User/Query Groups and configure Concurrency Scaling (for required Queues). Automatic WLM will then dynamically manage memory allocation and concurrency amongst these queues based on the workload. Automatic WLM also works with Short Query Acceleration allowing short running queries to complete.

    If you are managing WLM manually today, it might be worthwhile taking a look at this feature. You can read more about how Automatic WLM works here: https://docs.aws.amazon.com/redshift/latest/dg/automatic-wlm.html

    A few more noteworthy ones

    These are few more features that got added over the couse of 2019 – just ICYMI

    I believe with all these new capabilities, Redshift has now automated a whole lot of operations making administrators’ life simpler. Put it in typical Amazon way, Redshift now takes care of most of the “undifferentiated heavy lifting” 🙂

    Did I miss any new major announcement? What do you think about these features? Do let me know your thoughts in the comments section below.

  • AWS re:Invent|Beyond The Shiny New Toys |Redshift

    AWS re:Invent|Beyond The Shiny New Toys |Redshift

    This is part of the Beyond The Shiny New Toys series where I write about AWS reInvent 2019 announcements

    Redshift has been going through a series of major changes which tremendously simplifies schema design and overall management of workloads. Here are some of the new features that were announced around the re:Invent 2019 timeframe that I specifically think a lot of customers (based on my earlier interaction with them) would look to put in use.

    Materialized Views

    https://aws.amazon.com/about-aws/whats-new/2019/11/amazon-redshift-introduces-support-for-materialized-views-preview/

    This has been one of the most wanted asks from many customers who migrate from other DW systems into Redshift. Materialized Views (MV) have a significant improvement on query performance for repeated workloads such as Dashboarding, queries from BI tools or certain predictable steps in ETL pipelines.

    Till now, Redshift lacked support for MV and the recommendation has been to either modify your workloads or implement architectural changes such as performing a query rewrite using pg_bouncer

    You can now use the native MV (available in preview) capability to address such needs. There are some current limitations though. For example, you need to manually refresh the MV whenever your base tables undergo changes. Over time, I am sure AWS folks would address these limitations based on customer feedback. You can find the complete set current limitations here: https://docs.aws.amazon.com/redshift/latest/dg/mv-usage-notes.html

    Automated Table Sort

    https://aws.amazon.com/about-aws/whats-new/2019/11/amazon-redshift-introduces-automatic-table-sort-alternative-vacuum-sort/

    One of the most important best practices when it comes to Redshift is to keep the data Sorted. This would directly improve query performance as Redshift can read specific blocks of data (when your query has a filter) and also apply compression better. If your data is NOT sorted well enough, Redshift may read unwanted blocks and then later skip them in the memory. So, you choose a SORT Key for your table initially and on incremental data loads, you had to earlier run “VACUUM SORT” command to make sure the data blocks are sorted.

    With this new feature, Redshift automatically performs the sorting activity in the background without any interruption to query processing. However, if you do have large data loads, you may still want to run “VACUUM SORT” manually (as Automatic Sorting may take a while to fully Sort in the background).

    You can also monitor the “vacuum_sort_benefit” and “unsorted” columns in the SVV_TABLE_INFO table. Together, these columns tell you the following:

    1. What percentage of a particular table is “unsorted”
    2. How much percentage benefit would you derive by running “VACUUM SORT” against the table

    Check the following documentation for more details: https://docs.aws.amazon.com/redshift/latest/dg/t_Reclaiming_storage_space202.html#automatic-table-sort

    ALTER SORT KEY Dynamically

    https://aws.amazon.com/about-aws/whats-new/2019/11/amazon-redshift-supports-changing-table-sort-keys-dynamically/

    When you start using Redshift, you pick Distribution and Sort Keys for your tables. However, over time, as your workload evolves there may be a need to modify the Sort Keys that you originally picked. Previously, this meant, recreating your table with the new set of Sort Keys and loading all the data into that newly created table. This was required because, Redshift physically sorts the data in the underlying storage. Changing your Sort Keys meant re-sorting your data.

    With this new feature, you can now dynamically change the Sort Keys of your existing table. Redshift, behind the scenes will re-sort the data while your table continues to be available for querying. This provides more flexibility when it comes to schema design.

    Cross Instance Restore

    https://aws.amazon.com/about-aws/whats-new/2019/11/amazon-redshift-launches-cross-instance-restore/

    This is another important feature and one that has been long requested by customers. You may want to restore a snapshot of production DC2.8XL cluster into a smaller DC2.Large cluster for your test/dev purposes. Or you may have a DC2.Large cluster with many number of nodes. You have a snapshot of that cluster and wish to launch a cluster with smaller number of DC2.8XL cluster. This wasn’t possible until this capability was introduced.

    One of the important aspects that you want to consider when doing this exercise is to undersatnd how would your “target” cluster’s storage utilization on each node would look like. The following command in the AWS CLI would throw you some options to consider:

    aws redshift describe-node-configuration-options --snapshot-identifier <mycluster-snapshot> --region eu-west-1 -—action-type restore-cluster

    Automatic Workload Management

    https://aws.amazon.com/about-aws/whats-new/2019/09/amazon-redshift-announces-automatic-workload-management-and-query-priorities/

    This isn’t a re:Invent timeframe announcement as such. This was announced in September. But I am including it here because this is a big one and simplifies day to day operations of a Redshift cluster for an administrator.

    Even some of the large Redshift customers find it cumbersome to perform Workload Management (WLM) on Redshift. WLM on itself is a pretty deep topic and is something that you cannot avoid once your workloads start scaling on Redshift.

    WLM provides many controls for a Redshift administrator to manage different workloads and give better experience for all types of users of the system. Over the years, WLM has evolved from a static configuration to a dynamic configuration (of queues and memory) with Queue Priorities, Query Monitoring Rules, Queue Hopping, Short Query Acceleration and Concurrency Scaling.

    However all of these require someone to continuously observe the workloads on the cluster and keep tweaking these configurations. With Automatic WLM, Redshift removes much of these overheads from the administrator.

    With Automatic WLM, you still define Queues, Queue Priorities, User/Query Groups and configure Concurrency Scaling (for required Queues). Automatic WLM will then dynamically manage memory allocation and concurrency amongst these queues based on the workload. Automatic WLM also works with Short Query Acceleration allowing short running queries to complete.

    If you are managing WLM manually today, it might be worthwhile taking a look at this feature. You can read more about how Automatic WLM works here: https://docs.aws.amazon.com/redshift/latest/dg/automatic-wlm.html

    A few more noteworthy ones

    These are few more features that got added over the couse of 2019 – just ICYMI

    I believe with all these new capabilities, Redshift has now automated a whole lot of operations making administrators’ life simpler. Put it in typical Amazon way, Redshift now takes care of most of the “undifferentiated heavy lifting” 🙂


    Well those are the Redshift announcements that I found interesting. Did I miss anything? Let me know in the comments.